Testing SteamVR applications built in Unity
Learn how to configure GameDriver to work with SteamVR applications
Utilizing GameDriver with a SteamVR-based Unity project is much like working with other XR projects, with a few additions.
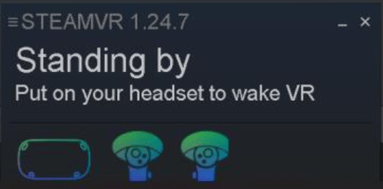
To start, ensure that the SteamVR application is installed and running on the same system that you'll be testing. Next, ensure that the devices (i.e. headset and controllers) you will be testing with are connected and recognized by SteamVR. If so, they should appear as bluish-green icons on the SteamVR panel, as shown below. If they are greyed out, this indicates that SteamVR does not currently register the devices as connected.

At this point, it may be useful to check the controller bindings in the SteamVR Binding UI, as it may assign it the bindings of a different type of controller by default. It is also worth double-checking the "SteamVR Input" section of your Unity project (found under the Windows tab in the toolbar) to confirm all the desired action sets are established, as GameDriver will only be able to utilize the actions established there.
Once your project and bindings are set up and SteamVR is up and running, you can begin testing. When testing a SteamVR project, the information found on the general-purpose GameDriver XR testing page applies, with a few minor differences.
Registering Input Events
There are three different ways of registering input events when working with SteamVR. The first approach is all-encompassing and will register every action to every supported device type, regardless of whether that device is currently connected/recognized.
api.IntegerInputEvent("sub/sources/All", 1, 0);
As this is the slowest approach and creates a number of unnecessary action registrations, it is not recommended unless absolutely necessary.
A slightly more limiting approach would be to just register actions to the more commonly used device types, such as just the left and right-hand controller, head, and camera, which can be don't with the following call:
api.IntegerInputEvent("sub/sources/Default", 1, 0);
However, as this will still register to every supported set of device types (excluding those not in the device categories listed above), regardless of whether they are connected, this approach is still not recommended unless your situation necessitates it.
The most direct and efficient approach is to load a specific bindings file and register just the loaded actions.
string bindings = api.LoadDeviceDescription(@"[Insert the path to your JSON action bindings file here]");
api.IntegerInputEvent("sub/binding/nameOfBinding{" + bindings);
As seen above we first use 'LoadDeviceDescription' to load our desired bindings file, and then register just the loaded bindings. Note that "nameOfBinding", seen on the second line, can be replaced with any name that you choose, as this is simply the name that will be used in the logs to label which binding set is being used.
Other Notable Differences
Another thing to note when working specifically with a SteamVR project is that actions must be called directly from a particular device, known as a "source". While all InputEvent calls can be used, the path that is passed must include the source, separated from the rest of the path by a '{' character, following an "action{source" structure. For instance, the following ButtonPress calls are being made on the left-hand and right-hand controller sources respectively.
api.ButtonPress("actions/default/in/SnapTurnLeft{LeftHand", frames, 1.0f);
api.ButtonPress("actions/default/in/SnapTurnLeft{RightHand", frames, 1.0f);
Another point of difference is in how SteamVR handles position and rotation values. Since it handles these values as a unified matrix, when setting these values we must pass them both together as a "pose". This can be done with the following call structure:
api.PoseInputEvent("actionName{source", position, rotation, frames);
The last thing to note is in regard to the fact that SteamVR defaults to using Legacy XR for head movement, and therefore the Legacy XR format must be used as shown below.
api.Vector3InputEvent("GDIOHMD/centerEyePosition", position, 1);
If this has for whatever reason been changed in your particular project, then use the regular SteamVR formatting like the following:
api.PoseInputEvent("actions/default/in/Pose{Head", position, rotation, 0);
